Learnvelo LTI 1.3 Setup Guide for D2L Brightspace
Connect Learnvelo to D2L Brightspace using LTI 1.3
This guide walks LMS administrators through connecting Learnvelo to D2L Brightspace using LTI 1.3. After completing these steps, instructors will be able to add Learnvelo content directly into their Brightspace courses.
Visual reference: For screenshots of the Brightspace admin interface, see D2L's official documentation on Tool Registration, Deployment, and Links and LTI Advantage (v1.3).
Prerequisites
- D2L Brightspace administrator access
- A Learnvelo account with the LMS Admin role. If you don't have one, sign up at app.learnvelo.com/signup and select LMS Admin as your role during registration -- no approval from Learnvelo is needed to create an account.
- Access to Brightspace Admin Tools > External Learning Tools
Overview
Setting up the integration requires configuring both Learnvelo and Brightspace. You will switch between the two systems during this process:
- Register your institution in Learnvelo
- Create an LTI platform in Learnvelo and copy the tool configuration URLs
- Register Learnvelo as an external learning tool in Brightspace
- Enter the Brightspace-provided configuration values back in Learnvelo
- Create a deployment and add the Deployment ID
- Test the connection
Step 1: Register Your Institution in Learnvelo
If your institution is not yet registered in Learnvelo, you will need to register it first.
- Log in to Learnvelo at app.learnvelo.com
- Navigate to My Institutions from the dashboard menu
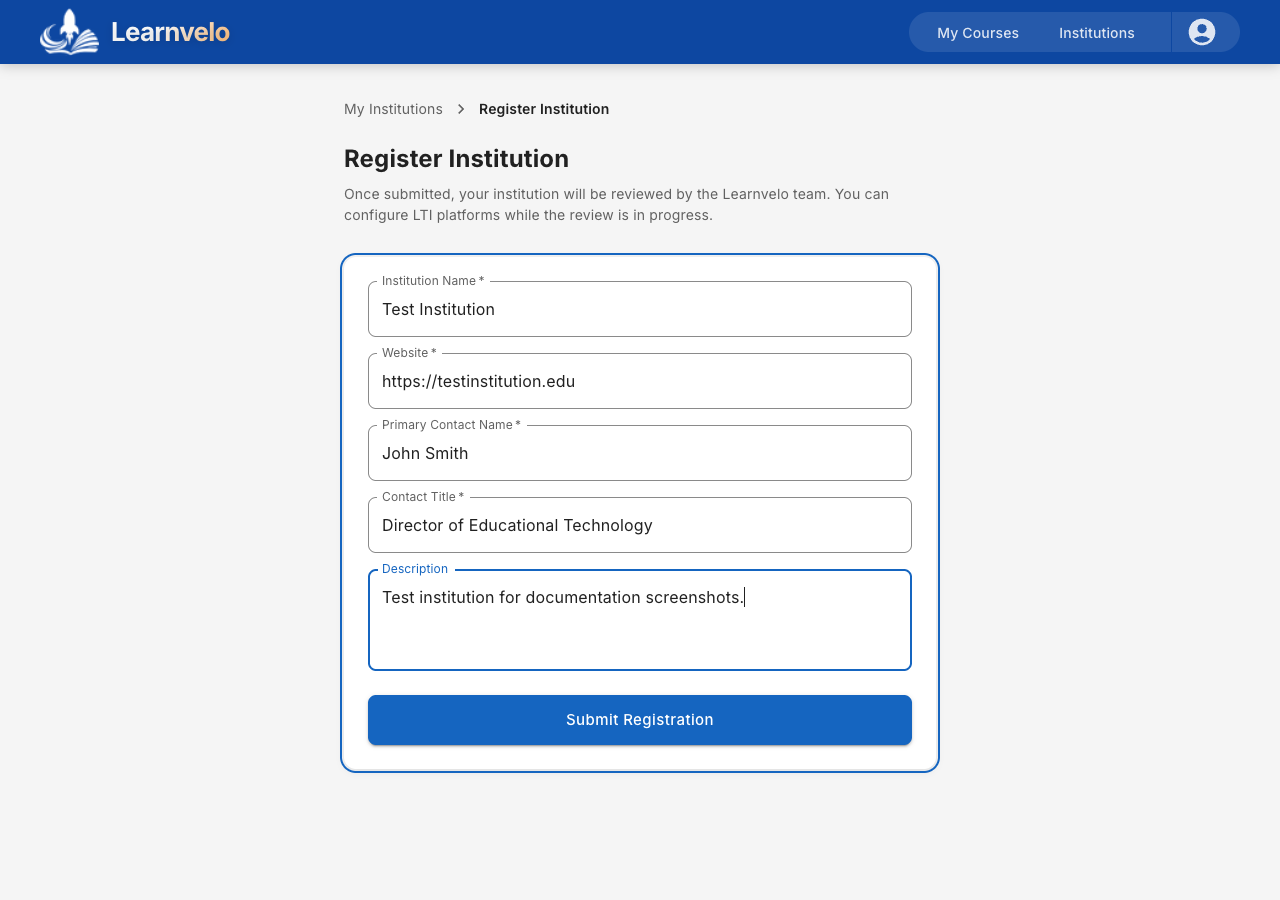
- Click Register Institution
- Fill in the required fields:
- Institution Name -- Your institution's official name
- Website -- Your institution's website URL
- Primary Contact Name -- The person managing the LTI integration
- Contact Title -- Their role
- Click Submit Registration
Note: Your institution will be reviewed by the Learnvelo team. You can proceed with the LTI configuration while the review is in progress, but LTI launches will not work until approval is granted.
Step 2: Create an LTI Platform in Learnvelo
- From your institution's detail page, go to the Integrations tab
- Click Add Integration
- In the dialog, enter:
- Platform Name -- A descriptive name (e.g., “Brightspace Production”)
- LMS Type -- Select D2L Brightspace
- Environment -- Select Production
- Click Create Integration
You will be redirected to the platform detail page.
Step 3: Copy Tool Configuration URLs from Learnvelo
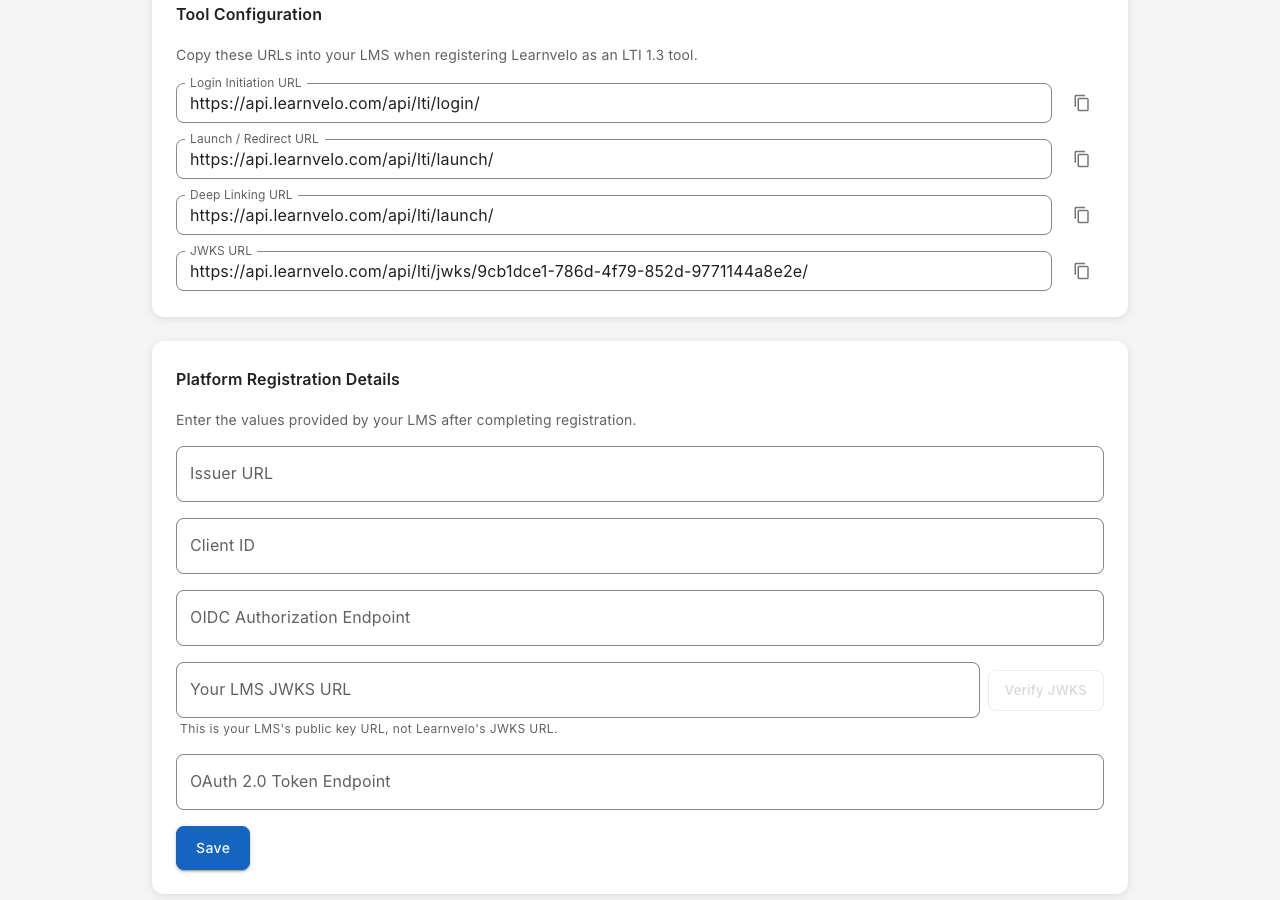
On the platform detail page, locate the Tool Configuration section. You will need these URLs when configuring Brightspace:
| Field | URL |
|---|---|
| Login Initiation URL | https://api.learnvelo.com/api/lti/login/ |
| Launch / Redirect URL | https://api.learnvelo.com/api/lti/launch/ |
| Deep Linking URL | https://api.learnvelo.com/api/lti/launch/ |
| JWKS URL | https://api.learnvelo.com/api/lti/jwks/{platform-id}/ |
Important: The JWKS URL is unique to your platform. Use the copy button next to each field to ensure accuracy.
Keep this Learnvelo tab open -- you will return to it after configuring Brightspace.
Step 4: Register Learnvelo in Brightspace
Now switch to your Brightspace admin panel.
D2L reference: See Tool Registration, Deployment, and Links in the Brightspace documentation for screenshots of the admin interface described in these steps.
4a. Open External Learning Tools
- In Brightspace, go to Admin Tools > External Learning Tools > Manage Tool Providers
4b. Register a New Tool Provider
- Click Register Tool Provider
- Select Standard Registration (manual)
- Fill in the following fields:
| Brightspace Field | Value |
|---|---|
| Name | Learnvelo |
| Domain | api.learnvelo.com |
| OIDC Login Initiation URL | Paste the Login Initiation URL from Learnvelo |
| Redirect URL | Paste the Launch / Redirect URL from Learnvelo |
| Keyset URL | Paste the JWKS URL from Learnvelo |
4c. Configure Extensions
Enable the following extensions as needed:
- Assignment and Grade Services -- Required for grade passback
- Names and Role Provisioning Services -- Optional, enables roster sync
- Deep Linking -- Required for the Learnvelo content picker
4d. Configure Security Settings
Under Security Settings, configure the tool to send user information:
- Send Institution Role -- Recommended
- Send Name Information -- Recommended, so student and instructor names display correctly in Learnvelo
- Send Email Information -- Recommended, so Learnvelo can match LTI users with existing accounts
Note: Sharing email provides a seamless experience for users who already have Learnvelo accounts. Sharing name ensures student and instructor names display correctly in Learnvelo.
4e. Save and Note the Configuration Values
- Click Save
- Brightspace will display the tool provider details including:
- Client ID -- Copy this value
- Issuer --
https://api.brightspace.com - Keyset URL (Brightspace's) -- Copy this for the JWKS field in Learnvelo
- OAuth2 Token URL --
https://auth.brightspace.com/core/connect/token
Step 5: Enter Brightspace Configuration in Learnvelo
Switch back to your Learnvelo tab.
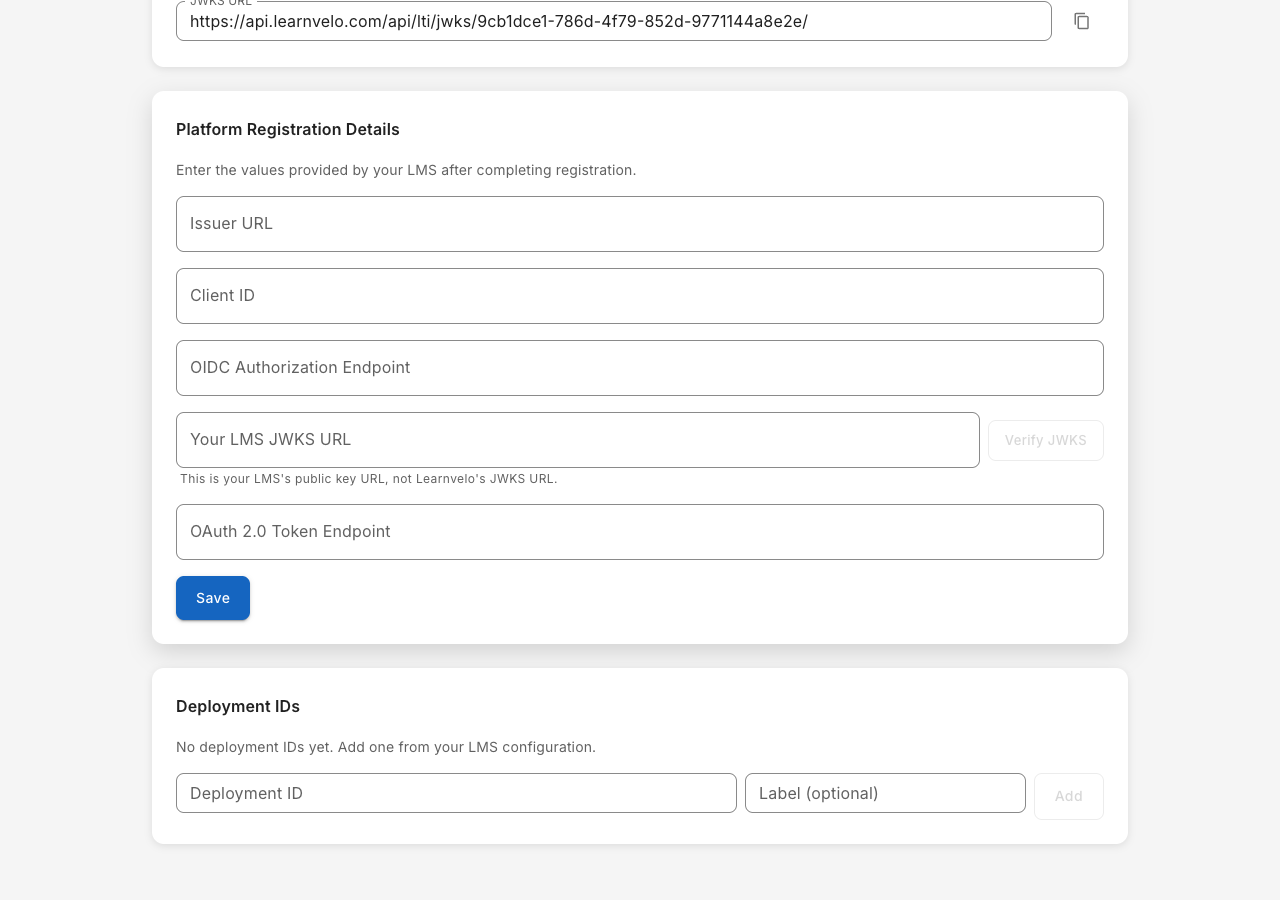
- On the platform detail page, locate the Platform Registration Details section
- Enter the following values:
| Learnvelo Field | Value |
|---|---|
| Issuer URL | https://api.brightspace.com |
| Client ID | The Client ID from Brightspace (Step 4e) |
| OIDC Authorization Endpoint | https://auth.brightspace.com/core/connect/authorize |
| Your LMS JWKS URL | The Keyset URL shown in the Brightspace tool details |
| OAuth 2.0 Token Endpoint | https://auth.brightspace.com/core/connect/token |
- Click Verify JWKS to test that Learnvelo can reach Brightspace's public keys
- Click Save
Step 6: Create a Deployment and Add the Deployment ID
D2L reference: See the Deployments section of Tool Registration, Deployment, and Links in the Brightspace documentation for screenshots of the deployment configuration.
6a. Create a Deployment in Brightspace
- In Brightspace, return to the tool provider you just registered
- Under Deployments, click New Deployment
- Configure:
- Name -- A descriptive name (e.g., “Learnvelo - All Courses”)
- Security Settings -- Configure as appropriate for your institution
- Org Units -- Select which organizational units should have access to Learnvelo
- Click Create Deployment
6b. Note the Deployment ID
Brightspace will assign a Deployment ID to the new deployment. Copy this value.
6c. Enter the Deployment ID in Learnvelo
- Return to the Learnvelo platform detail page
- Scroll to the Deployment IDs section
- Enter the Deployment ID from Brightspace
- Optionally add a label (e.g., “All Courses” or “Department of Engineering”)
- Click Add
Step 7: Test the Connection
The Getting Started checklist on the platform detail page tracks your progress. Once all four steps are complete, your integration is ready.
To verify the connection end-to-end:
- In Brightspace, navigate to any course as an instructor
- Go to Content > Add Existing Activities > External Learning Tools
- Select Learnvelo from the list
- The Learnvelo content picker should load, confirming the connection works
Troubleshooting
“JWKS verification failed”
- Ensure the LMS JWKS URL field in Learnvelo contains Brightspace's keyset URL, not Learnvelo's JWKS URL
- If your Brightspace instance is behind a firewall, ensure the keyset endpoint is accessible from the public internet
“Integration Pending Approval”
Your institution must be approved by Learnvelo before LTI launches will work. Contact support@learnvelo.com if approval is taking longer than expected.
LTI launch shows a blank page or error
- Verify the Issuer URL is
https://api.brightspace.com - Verify the Client ID matches exactly
- Ensure the deployment is active and the correct organizational units are selected
Grade passback is not working
- Verify that Assignment and Grade Services is enabled in the Brightspace tool provider extensions
- Ensure the content was linked using the Learnvelo deep linking tool
- Check that grade passback was enabled during the deep linking content selection
Reference: D2L Brightspace-Specific URLs
| Purpose | URL |
|---|---|
| Issuer | https://api.brightspace.com |
| OIDC Authorization | https://auth.brightspace.com/core/connect/authorize |
| OAuth 2.0 Token | https://auth.brightspace.com/core/connect/token |
| JWKS | Shown in the tool provider details in Brightspace |
Additional Resources
- D2L Brightspace: LTI Advantage (v1.3) Overview
- D2L Brightspace: Tool Registration, Deployment, and Links
- D2L Brightspace: Create an External Learning Tool Link
Trademark Notice
D2L and Brightspace are registered trademarks of D2L Corporation. Please visit d2l.com/trademarks for a list of D2L marks. Learnvelo is not affiliated with or endorsed by D2L Corporation.